
How to Add Conditional Fields to Checkout In WooCommerce

The checkout page is one of the most critical parts of any WooCommerce online store. There are millions of websites fighting for the same users. To stay ahead of the competition, personalize and optimize your checkout as much as feasible is necessary. Adding conditional fields to your WooCommerce checkout is one of the most intriguing ways to accomplish this.
That is why today’s tutorial will show you how to add conditional fields to checkout in WooCommerce. These fields enable you to implement conditional logic and display only the areas consumers need to fill out on the checkout page to speed up the buying process. So, let’s go through what conditional fields are and how they may help you take your business to the next level.
Why do we need to add conditional fields to Checkout in WooCommerce?
Conditional fields are fields with conditional logic that appear or hide another field when the condition is fulfilled. To build conditional logic, you’ll need at least one parent field and one or more child fields dependent on the parent field’s values. For example, if you allow your clients to pay by PayPal or credit card, you may only show the credit card data fields if they choose the Credit Card option. Those fields will not show if customers choose to pay with PayPal. This enhances the user experience on your site while also increasing conversion rates.
The following are the most common use cases for using conditional logic:
- Providing WooCommerce extra product choices that necessitate the collection of additional users’ information.
- Obtaining various sorts of data for different categories of consumers.
- Selling variable items or WooCommerce product add-ons. In short, conditional rules are used to show specific extra fields (or groups of data) on the product page based on the user’s selection.
How to add conditional fields to Checkout in WooCommerce
This part will explore how to use and add conditional logic and conditional fields to the WooCommerce checkout. Because creating meaningful conditional logic programmatically involves a significant amount of code, we recommend that you utilize a plugin. And the Checkout Manager will be the key for this presentation.
This plugin lets you add, edit, and delete many sorts of fields on the checkout page. Furthermore, you may use numerous custom fields on the WooCommerce checkout page to apply an endless number of conditional validations. It’s one of the most remarkable checkout plugins available, with over 80,000 active downloads. It offers a free version with basic functionality and three premium subscriptions starting at $19. Here is the detailed instruction for using this plugin to add conditional fields to checkout pages in WooCommerce:
Step 1: Create a new conditional logic
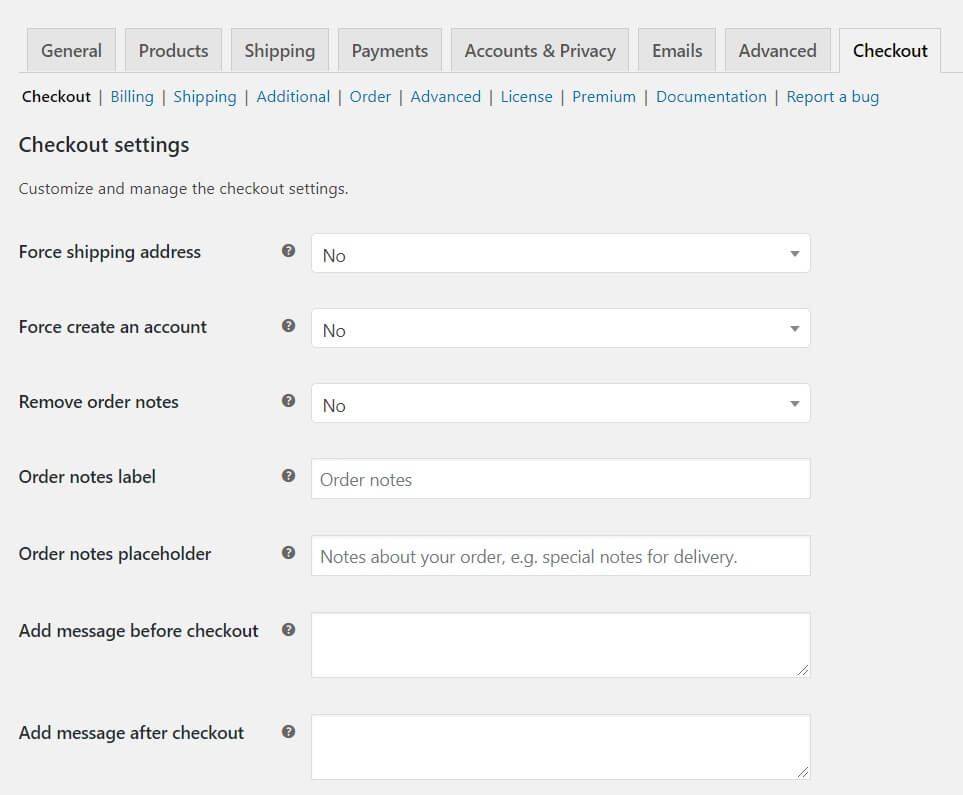
Now that you understand conditional logic and how it works, let’s make a conditional logic field using the WooCommerce Checkout Manager plugin. First, we need to create a condition to show a notification when users enter “admin” as their first name in the billing form. To begin, navigate to WooCommerce > Checkout > Billing from your WordPress dashboard. At that point, click the Add New Field button.
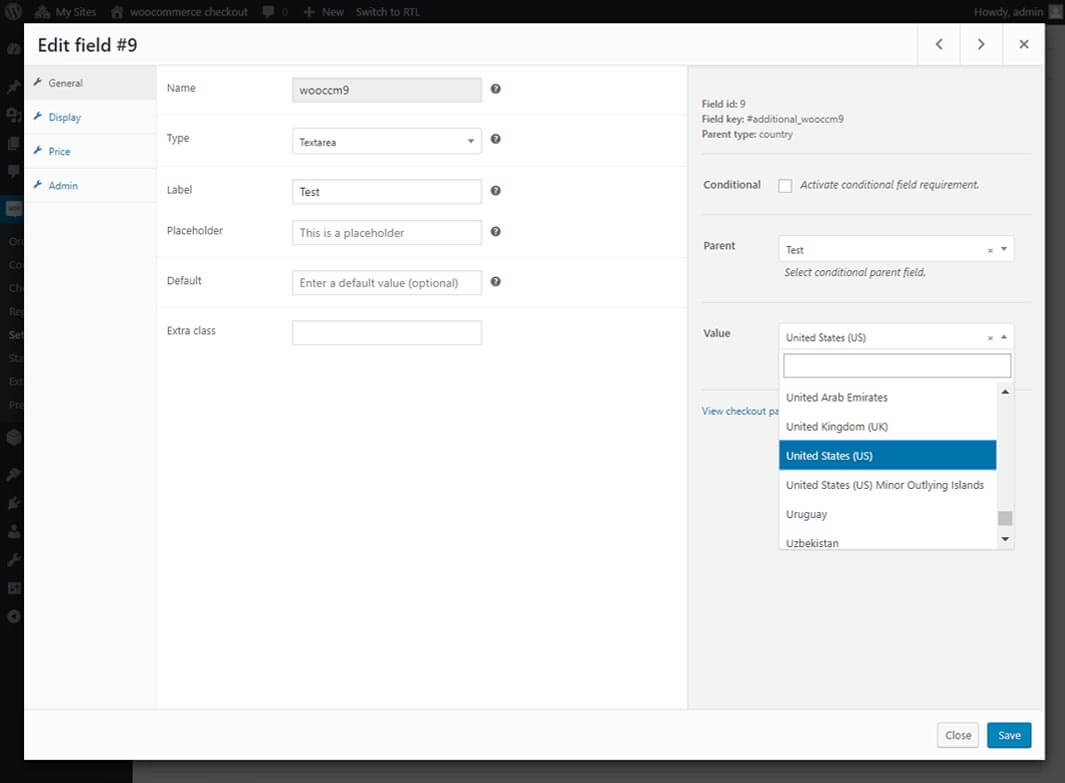
A window will be opened. That is the new field’s field editor. Select Message as the type and fill up the parameters like Label, Type, and Message. Additionally, in the right column, choose the First name as the parent field. Finally, enter “admin” in the First Name box and click Save.
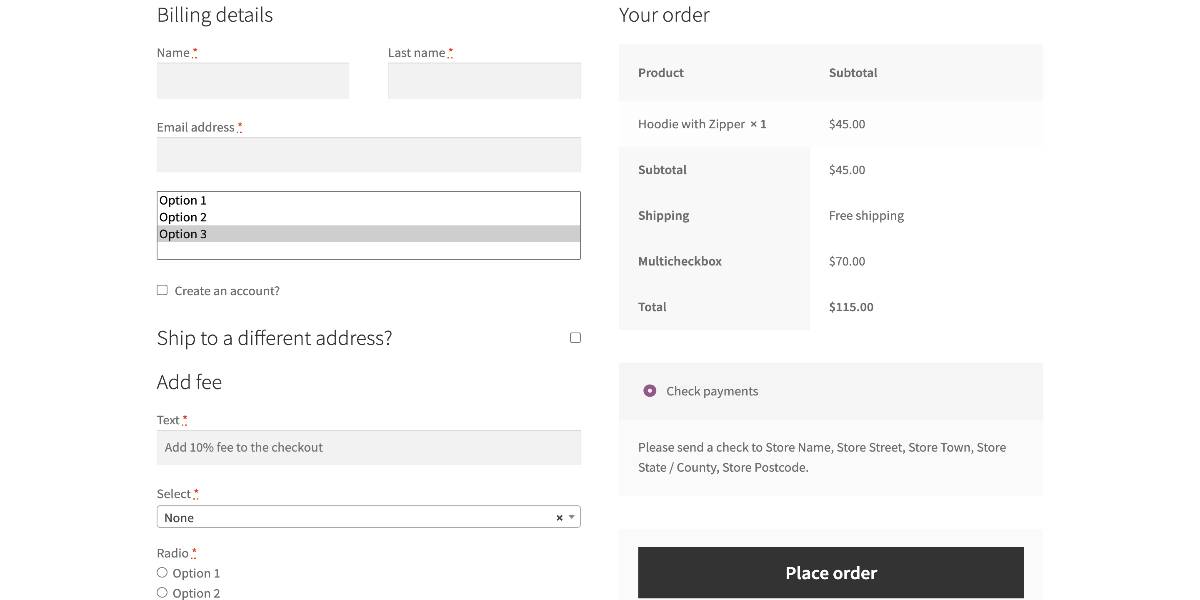
As you can see, we’ve made the First name field the parent field. It is time to put it to the test. So, navigate to your frontend checkout page and put “admin” in the first name form. You should see something like this.
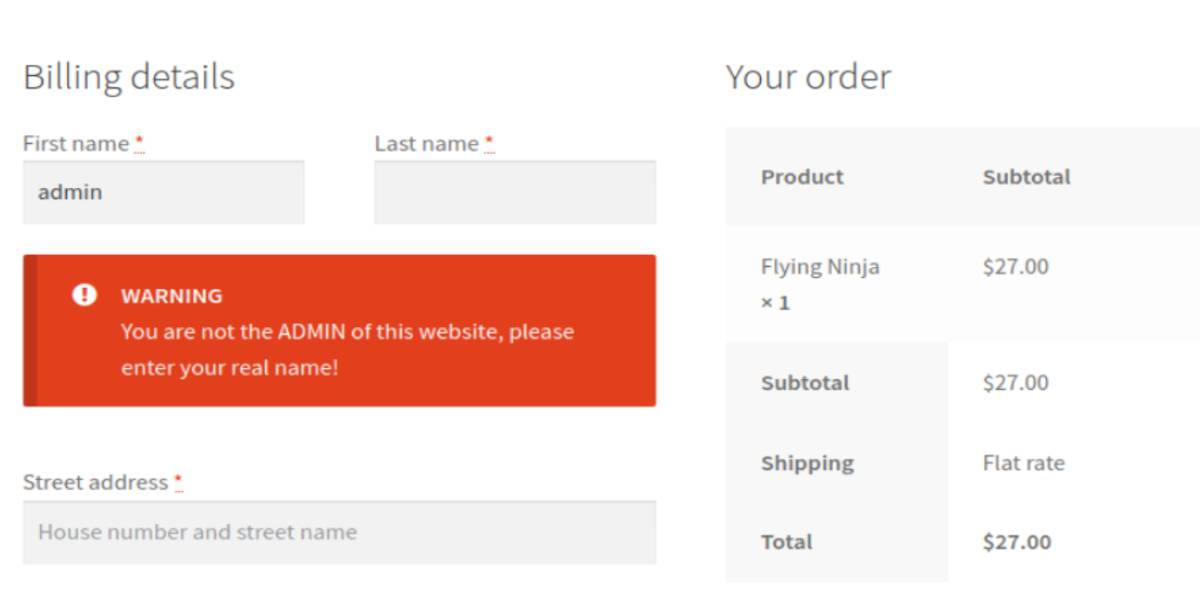
This is a simple example, but conditionals may include numerous fields, and things can become highly complex when several conditionals and custom fields are used. So, in the field manager page of the corresponding checkout form, you can see which fields have a condition and which are parent fields, making it easier to manage them (Billing, shipping, additional).

That’s how you use Checkout Manager to add a conditional field to the checkout in WooCommerce. Let’s have a look at a more complicated example now. The most significant part, of course, is that there is no limit to the number of custom fields that can apply the same or different criteria to the same parent field.
Step 2: Create a new parent field
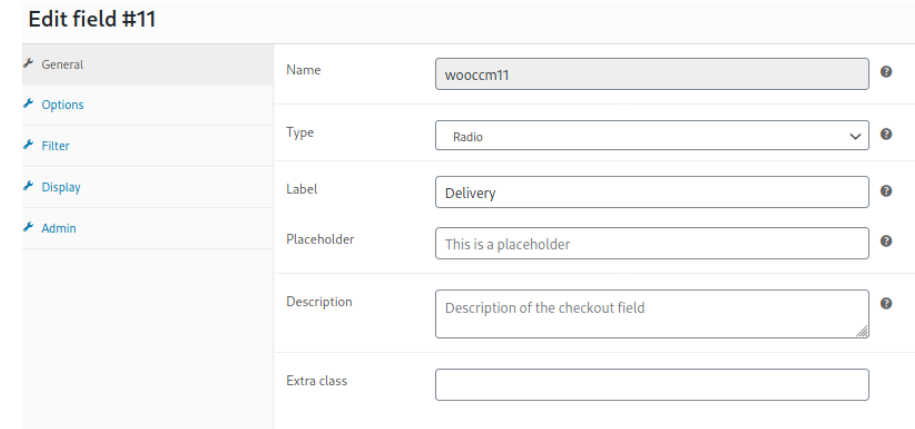
Let’s assume you want to provide your customers the choice of picking up their purchases at one of your distribution facilities or having them delivered to a specified place. You may use a radio button field to allow consumers to select one of two alternatives. To begin, navigate to WooCommerce > Checkout and add a radio type box. This field will be referred to as “Delivery” in this example.
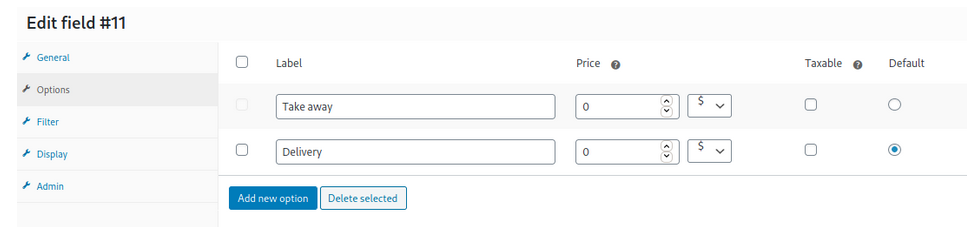
Then go to the Options menu. We’ll refer to them as Takeaway and Delivery. You may also choose a price for each choice and pick one as the default option.
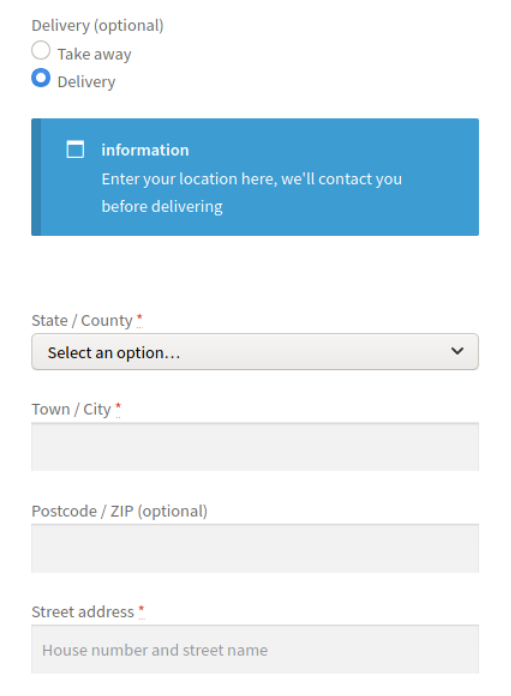
We’ll utilize some of the standard WooCommerce checkout fields for the Delivery option since we want to show various information to customers based on which checkbox they pick. In this manner, customers may fill out their information and have their items delivered to the address of their choice. So, modify the following WooCommerce default fields: state, city, postcode, and street address. Then, for each of them, write the identical conditional logic. Furthermore, we will add a conditional and use the radio field type Delivery as the parent field, displaying the State field if the users pick the Delivery option.
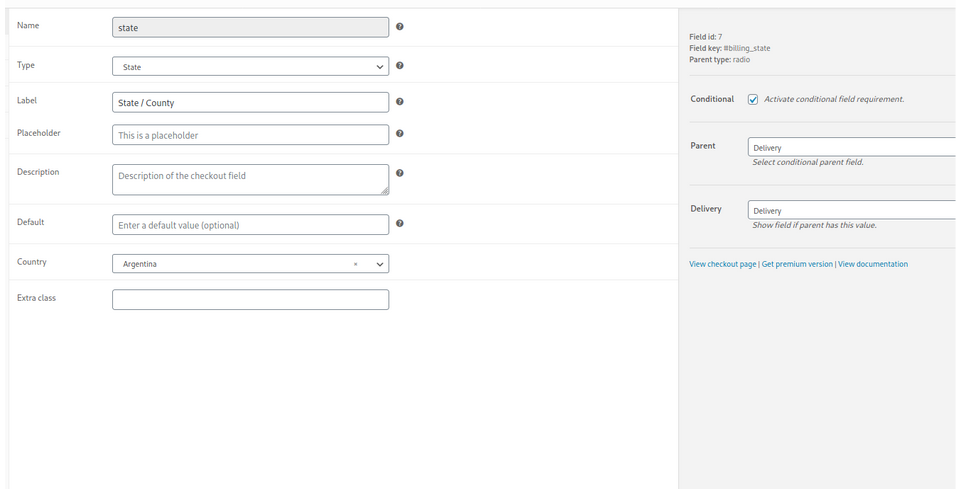
Of course, you may do the same for all or part of these fields. In this example, we’ll make a conditional using the following fields:
- billing_state
- billing_city
- billing_postcode
- billing_address_1
Step 3: Create a custom child field
Then, you will need to design a new custom field that will display when the client picks the Takeaway option, allowing you to send the goods to one of the distribution locations. Return to the plugin’s settings and insert a Select field type. Check the conditional checkbox, choose Delivery as the parent, and name it Takeaway under Delivery.
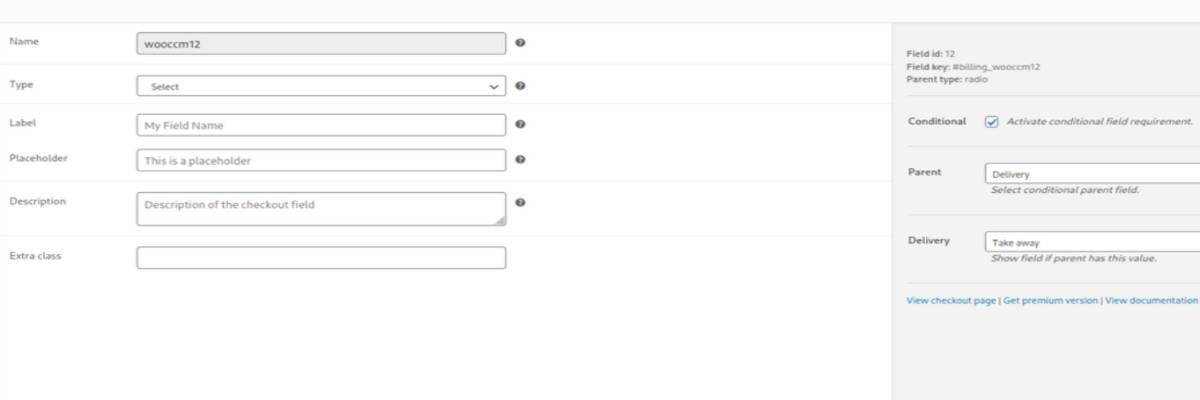
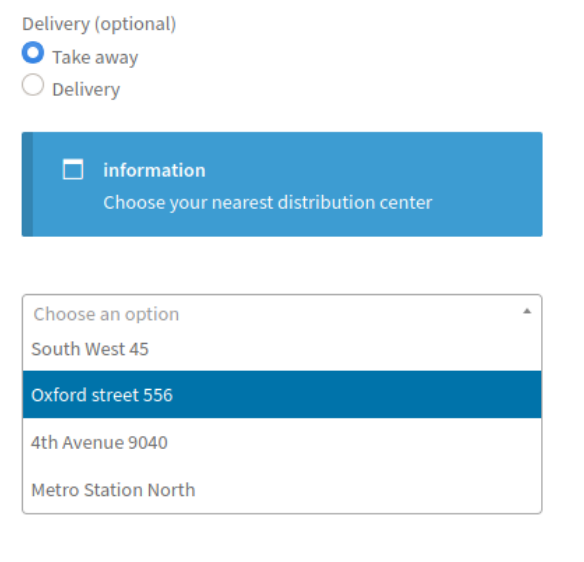
Following that, you must establish the addresses of the distribution centers. So, go to the Options area and enter a few addresses. Finally, save the modifications. Now it’s time to look at the front end. Go to the checkout page and choose some of the choices you’ve just generated. For example, if a user selects the Takeaway option, you may pick one of the distribution centers.
If customers choose Delivery, they must provide the address where they want their items delivered.
We’ve added two additional fields to show the informational Message, one for each choice, using the same conditionals as before. You now understand how to use more complicated logic to add conditional fields to the WooCommerce checkout. You may, however, take it a step further and construct even more complex logic. Let’s take a look at how to make chained conditionals.
Step 4: Manage a chained conditional
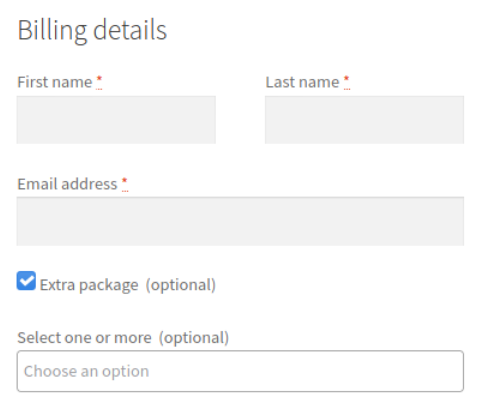
When working with a large number of linked conditionals, things may become rather complicated. Chained conditionals are an excellent example of this. It occurs when a conditional is applied to one field, and another is used to a separate field. To grasp it better, consider a conditional with a sub-conditional, which has another sub-conditional, and so on. The conditional hierarchy level and the number of custom fields you may utilize are infinite, allowing you to construct highly sophisticated logic with numerous dependents. So, let’s make a more complicated example with chained conditionals. Assume you wish to provide your clients the option of adding a bundle to their order. Paperboard, Gift, and Styrofoam will be available as alternatives. First, add a checkbox field type so the client may request the Extra package.
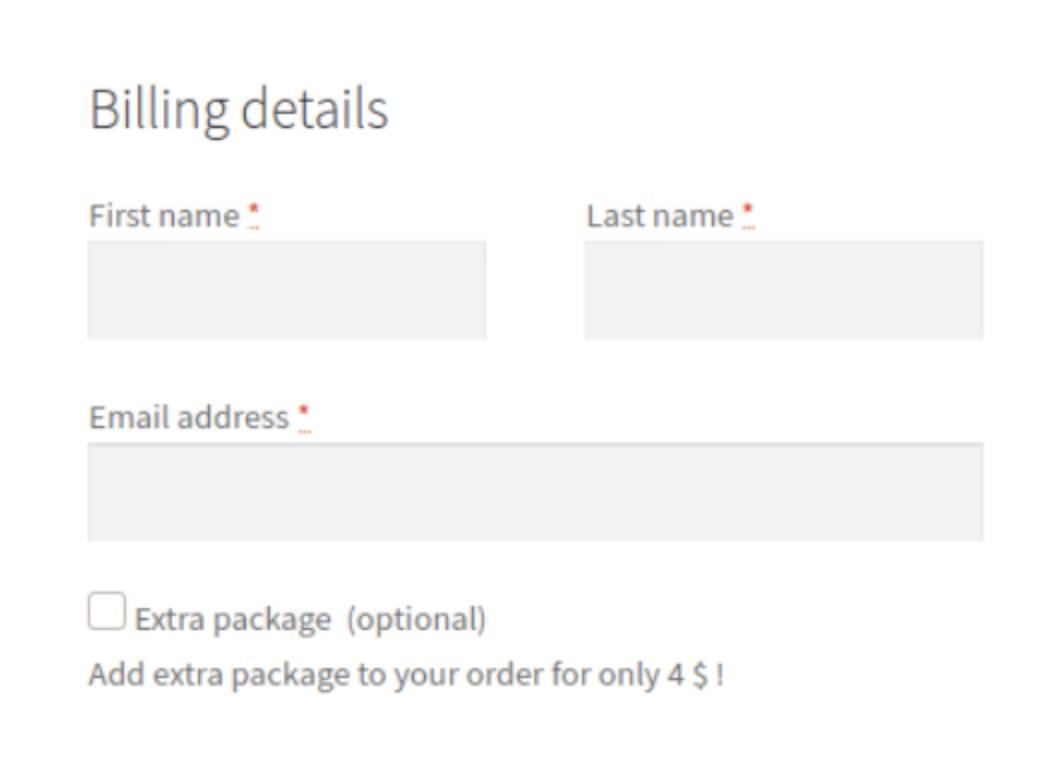
Enter the price you wish to add to the current purchase when the client selects the Extra Package checkbox in the Price tab of the field editor. Then you must consider the packing alternatives you will provide to your consumers. We’ll build a Multi-select field type to allow customers to pick more than one choice. Add a title and Extra Package as the parent field, and your conditional logic should look like this:

Then, on the Selections page, it’s time to design the new options for your clients.
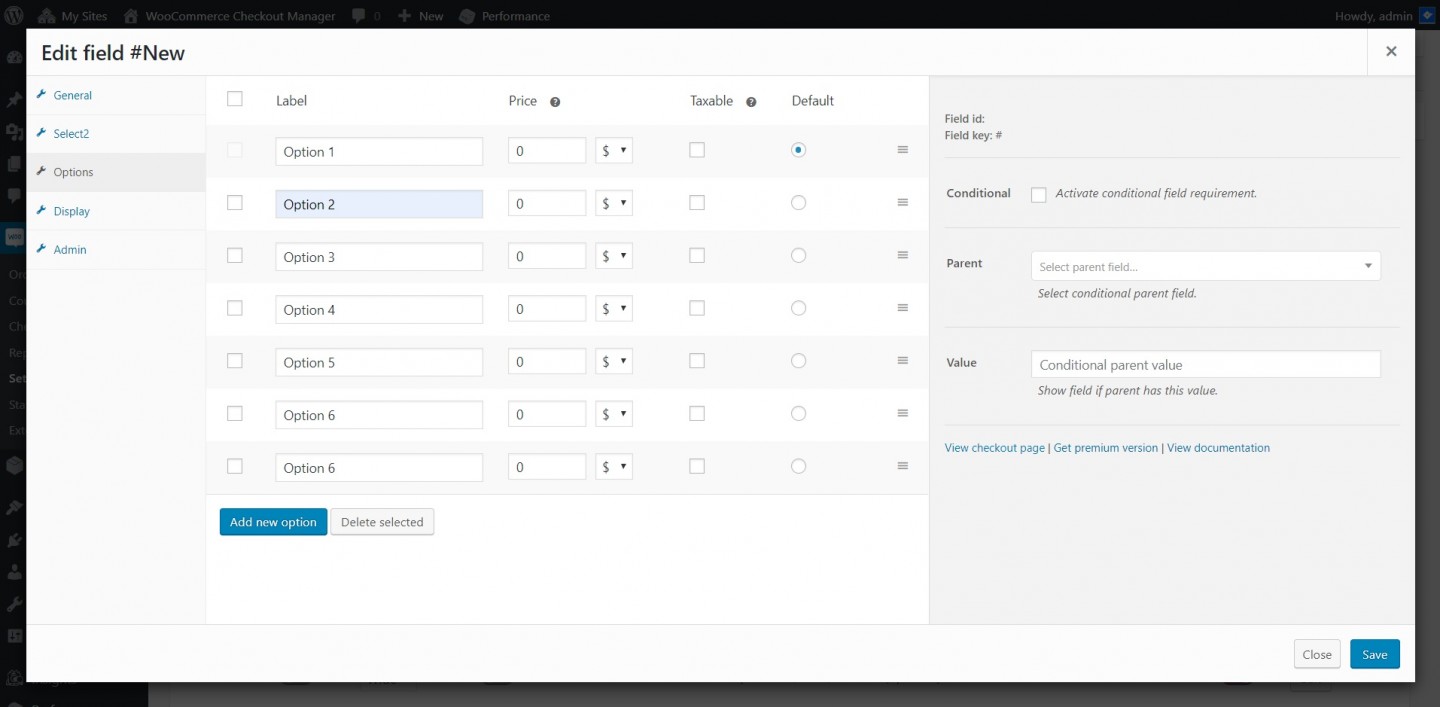
You may specify a different price for each choice on this screen. We won’t utilize that option because we previously established the price when we built the checkbox field. When you’re done with it, it’s time to look at the front end. If everything is in order, you should be able to tick the Extra packing section and pick various options:
To display a multi-select field, we utilized a single conditional. Let’s now build a chained conditional using each of the parent field’s options/values.
Step 5: Configure multiple options
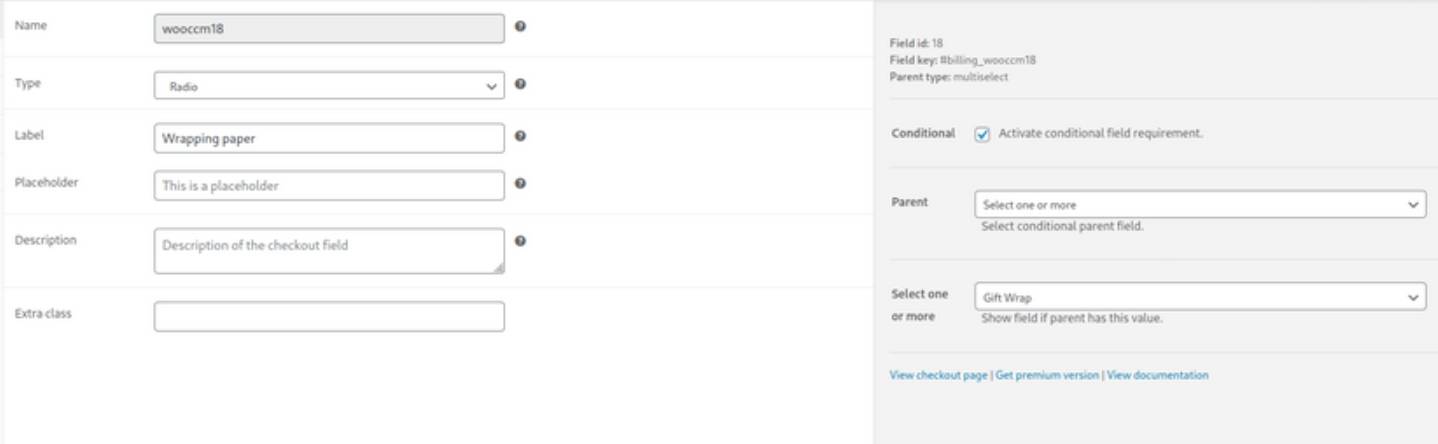
So, let’s go with the Gift wrap option and add some conditions. Let’s start by making a radio custom field and filling up the editor, as shown below.
We’ll be offering different paper prints for gift wrapping. Therefore we’ll utilize this option to allow consumers to pick one of them. To do so, go to the Options section and configure the radio field’s paper printing. We’ve set up the choices as follows:

And you’ll see something like this on the frontend:
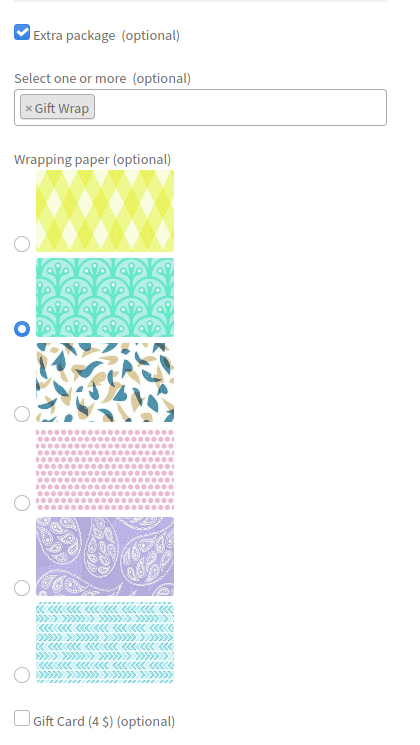
It is preferable to present photos rather than words when showing gift wrapping. We utilized photos that we had already submitted to the library to display images in each choice. You may use the following code to input pictures for the labels of each option:
<img class=”paper-style” src=”#path of your image url”>
So far, you’ve constructed a chained conditional logic with two layers and two interdependent conditions.
Step 6: Add conditional level
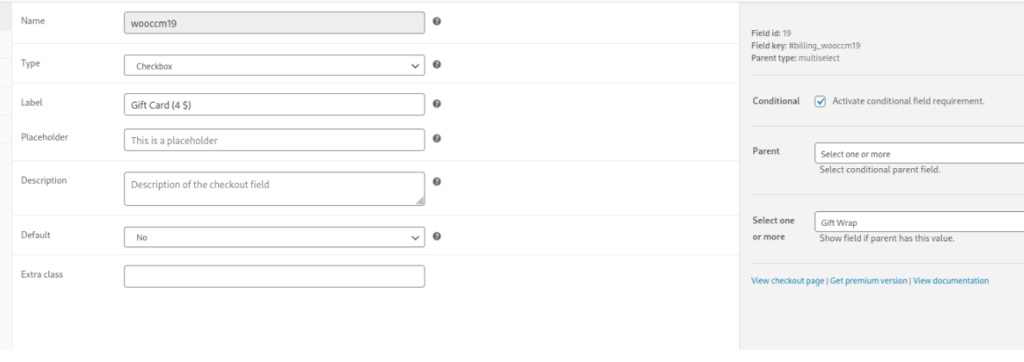
Let’s go a step farther and add one more level of conditional. In the last picture, you’ll see a new Gift Card section, which allows customers to add a specific gift card to the bundle. We will charge an extra $4 for this. On top of that, we’ll utilize a conditional to show a new custom field and allow customers to write the wording they want printed on the gift card. So, let’s make a new checkbox field and configure it as follows:
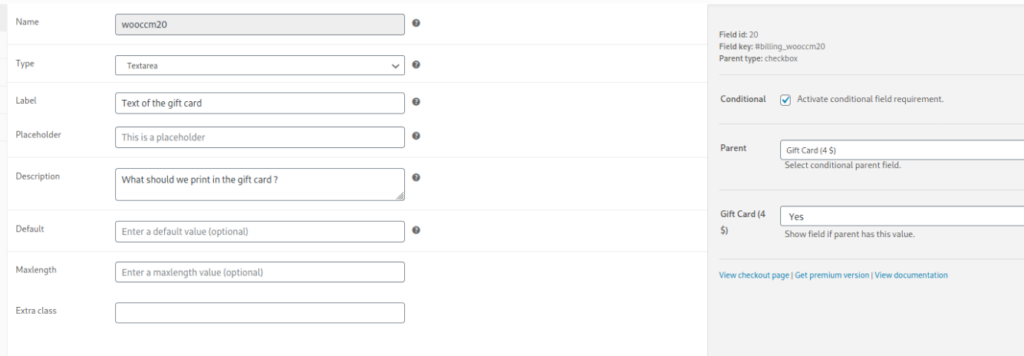
You can see how we refer to the same parent field and use the same condition as in the previous step for the Gift Wrap. Then, add a text area where users can type the text they want to appear on the gift card, and set it up as follows:
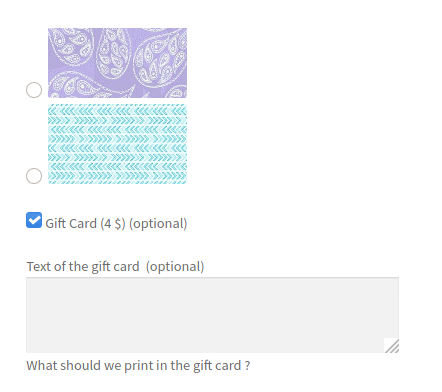
This will be the last conditional for today’s tutorial. It has the Gift card custom field as the parent field and the Text of the gift card as the child field. When customers pick the Gift card option, they will now see the following:
And that is how you construct complicated logic and add multiple conditional fields to the WooCommerce checkout page.
Three other plugins that help to add conditional fields to Checkout in WooCommerce
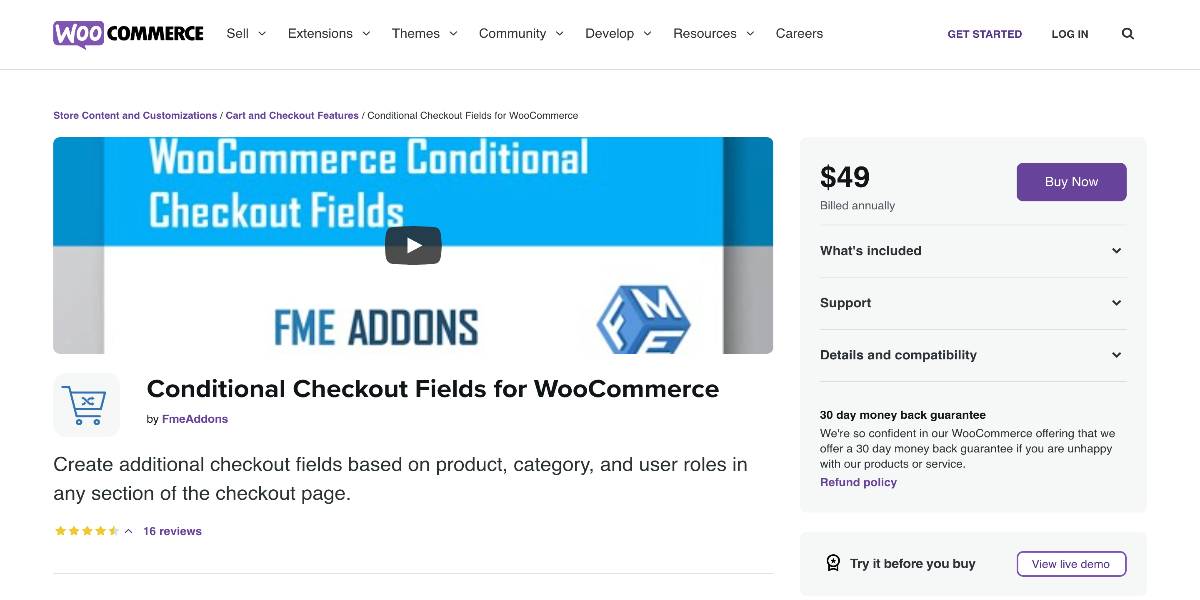
Conditional Checkout Fields for WooCommerce
To improve the checkout experience, redesigning your store’s page with interactive choices is an excellent choice. You can collect the data you need and provide critical advice for consumers with the Conditional Checkout Fields for WooCommerce. You may customize how they appear by assigning custom checkout fields to a particular product, category, or user role. Charge more for user-requested modifications. Make a field for each component of the checkout page. Thanks to the plugin, these fields may be displayed on the order page, my account page, and the invoice email. You may define whether fields are required or optional and change the default settings on the checkout page.
Outstanding features:
- Create checkout fields by using conditional logic.
- Custom checkout fields can be added to particular goods and categories.
- Specific user roles can be assigned with extra checkout fields.
- Set a price for each field and try out different customizations.
- Change the default checkout fields.
Price: You can get this plugin in the WooCommerce extension store at the cost of $49.
Profile Builder Pro
The Profile Builder Pro add-on makes it incredibly simple to add custom user fields to the WooCommerce checkout page, sell WooCommerce product add-ons, and manage the Customer Shipping and Billing Address fields. It also offers the ability to hide the Admin Bar on your WordPress site to provide your users a cleaner, less complex experience. You can also use Conditional Fields as a simple method to display or hide fields based on user input.
Outstanding features:
- Add WooCommerce customer fields straight to the frontend Register or Edit-profile forms developed using Profile Builder.
- Individual Billing and Shipping fields may be reordered, their names changed, and respective fields are shown using an easy-to-use interface.
- Display Edit Profile forms from Profile Builder on WooCommerce’s My Account page (by selecting “Edit your account and password credentials,” you will be sent to the Edit Profile form built using Profile Builder).
- Add support for all Profile Builder Pro custom field types, conditional logic, and repeater fields to the WooCommerce checkout page.
Price: The basic version is priced at $69 for a single site license.
Flexible Checkout Fields WooCommerce
We believe WooCommerce is the finest WordPress e-commerce plugin. However, it lacks certain fundamental functionality, such as customizing checkout fields in an easy-to-use interface. You can do it using hooks and filters, but why bother when you can do it with Flexible Checkout Fields WooCommerce? With this plugin, you may alter the default fields’ labels, hide them, or add your own. You may arrange the fields in any order you like. There are several fields, such as checkbox fields, date fields, and color picker fields (some of them exclusively in the PRO version).
Outstanding features:
- Enable conditional logic (display or hide) for fields dependent on the values of other fields (checkbox, radio, select).
- Enable conditional logic (display or hide) for fields dependent on the delivery method selected.
- Make your users’ purchase experience as seamless as possible.
- Remove any annoyances associated with the checkout process.
- Allow for customization of Delivery.
Price: The basic license for a single site of this plugin is 100% free.
Conclusion
Overall, conditional logic may assist you in improving user experience and increasing conversion rates on your website. As a result, including conditional fields in your WooCommerce checkout is an excellent approach to take your business to the next level. We’ve introduced new fields and developed both simple conditional logic and more sophisticated instances with chained conditionals.
We hope this tutorial will help you understand how to add conditional fields to checkout in WooCommerce. We’ve seen a few examples here, but this is only the tip of the iceberg. You may use conditional fields to improve your checkout in a variety of ways. As a result, we propose that you build new fields and experiment with the conditional.


